Introduction
In Part 1 of How to Make an Easy to Build Homemade Air Conditioner to Stay Cool, we showed you how to make a simple do-it-yourself mini air cooler. No one deserves to suffer from miserable heat if they don’t have to, right? It’s not easy to endure.
In Part 2 we go a little deeper by using an innovative way to create a more effective air cooler or air conditioner.
This method requires a little patience and more time than Part 1, but the output is more efficient and produces much cooler air. It’s also a fun process!
We found the idea from a YouTube video, but hey, knowledge is free!
Here’s what the finished product looks like.
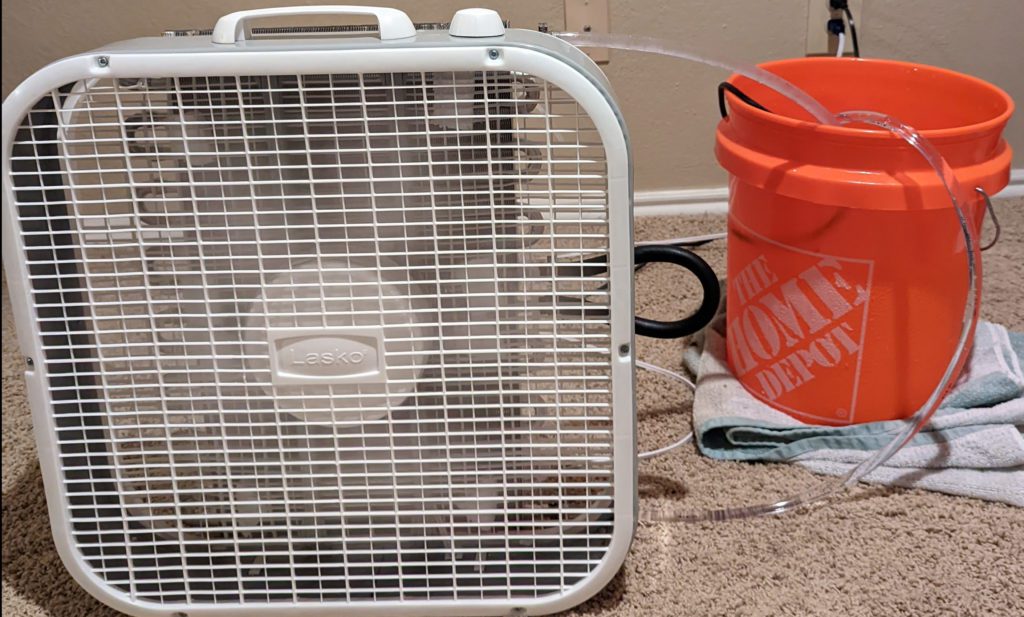
Read on to learn how to build something unique to use during a disaster or long-term end-of-the-world situation to keep you and your family members cooler.
Homemade Air Conditioner – Materials Needed
- Box Fan
- 5-Gallon Bucket
- Two Tube and Fin All Aluminum Transmission Coolers (Hayden Model 405) – total cost $100 ($50 ea) or you can salvage some from old cars
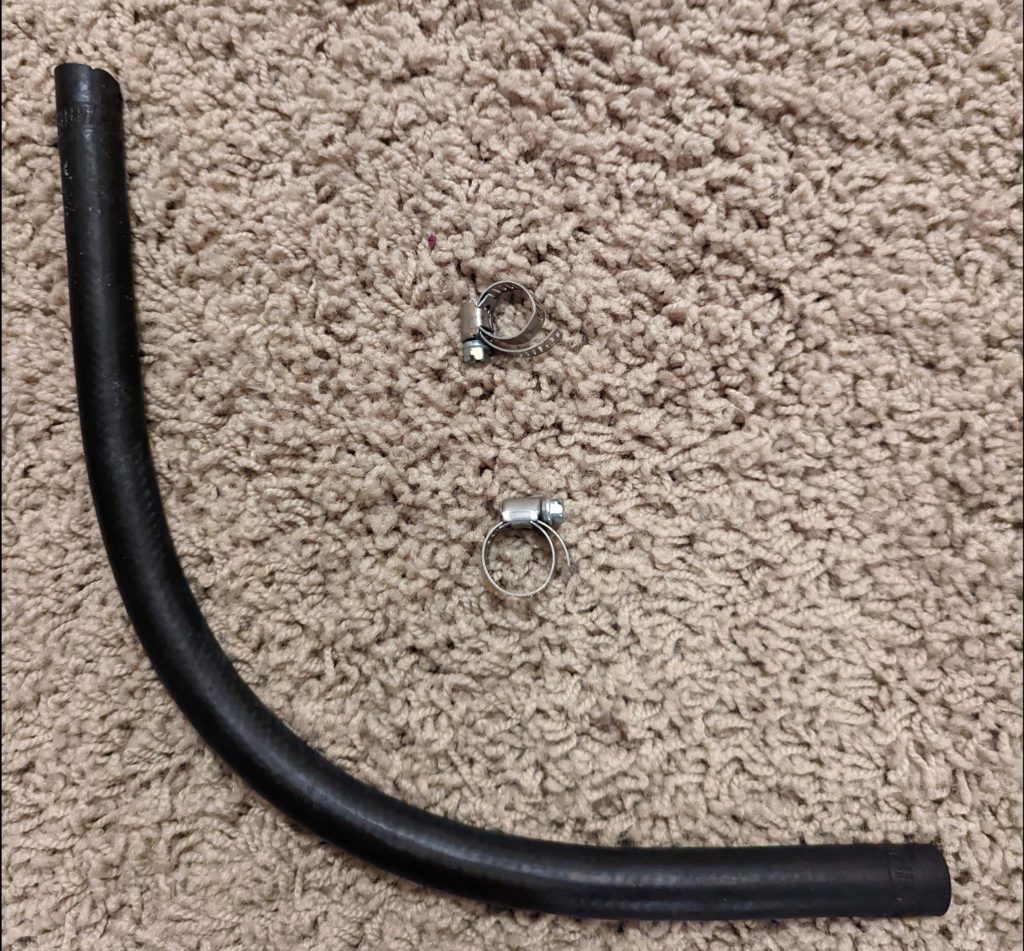
- Transmission Cooler Connector Hose – the transmission coolers we purchased came with this, but just use a durable short hose
- 5-6 Round Clamps – also came with the transmission cooler that we purchased
- 10ft of ⅜ “ ID Vinyl Tubing
- Small Water Pump (AC or DC – 12V used here) – Fish Tank Water Pumps are preferred since they can operate underwater (About $10-$15)
- Scrap Styrofoam (free and easy to locate)
- Zip Ties (8-12, but they need to be strong)
- Frozen Water Bottles or Ice (Here’s a video on how to make ice using solar power)
- Water
Instructions
Step 1)
Lay the box fan flat on the ground, front facing down.
Step 2)
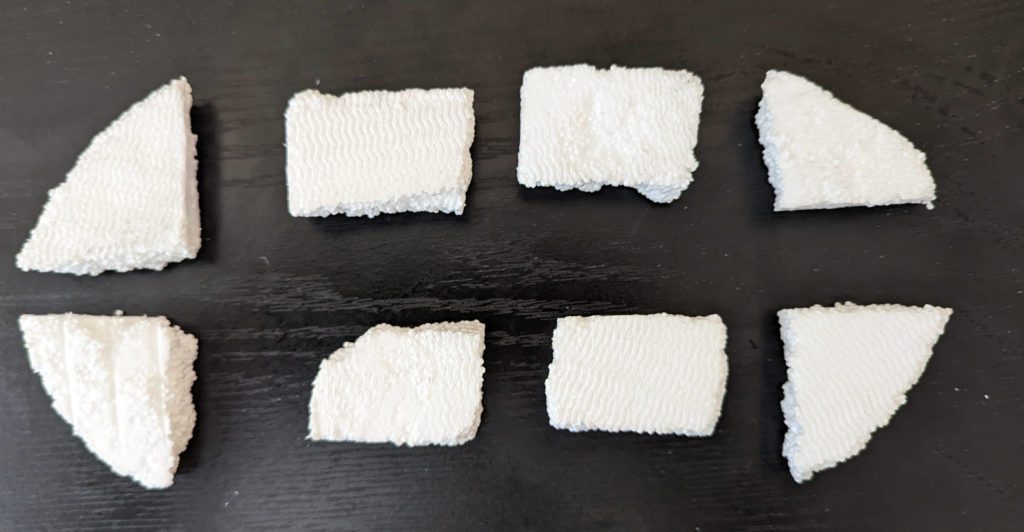
Cut out 8 small pieces of Styrofoam at least 1/2″ thick. The shapes don’t matter, because this is just padding between the transmission cooler and the fan. We found out that if you use wood, it just rots.
Step 3)
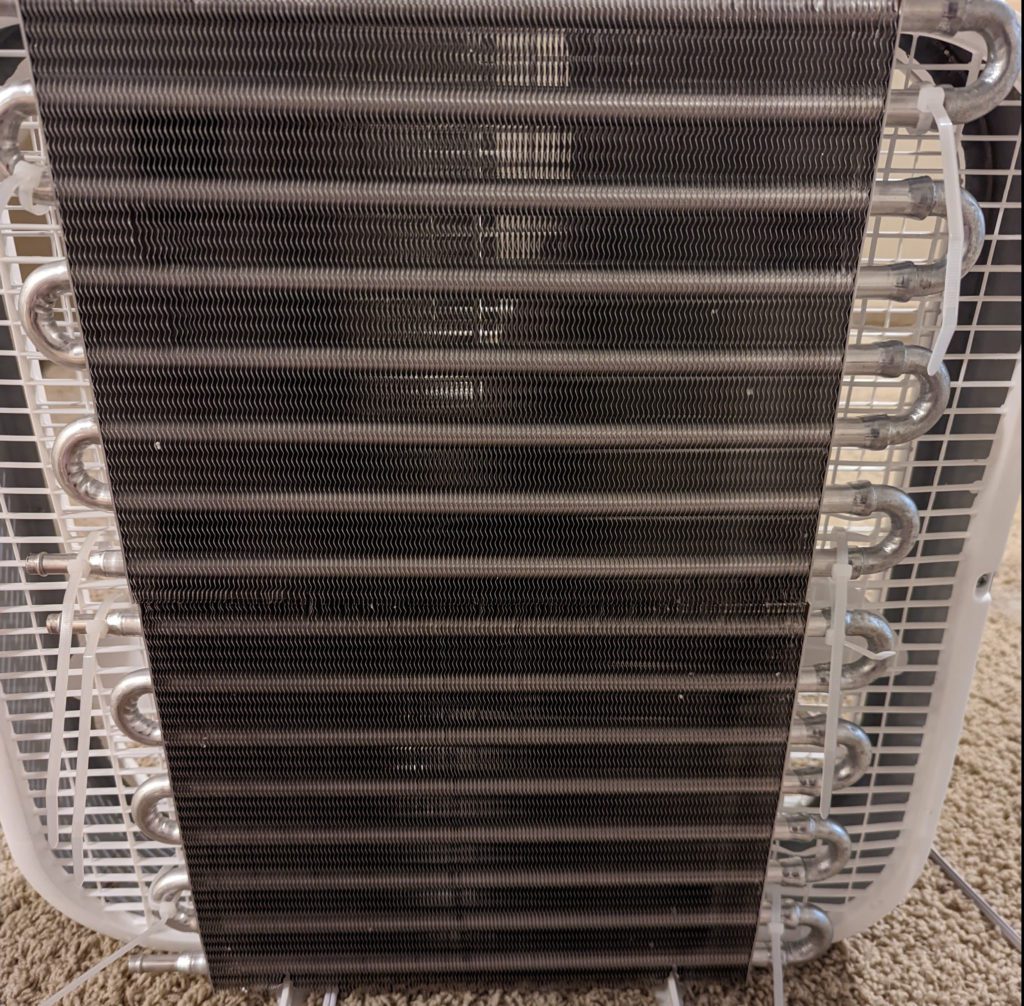
Position the transmission coolers stacked one next to the other on the back of the box fan. Make sure they (together) cover most of the box fan’s rear grill.
Ensure the opening of the transmission coolers are on the same side of the fan.
Step 4)
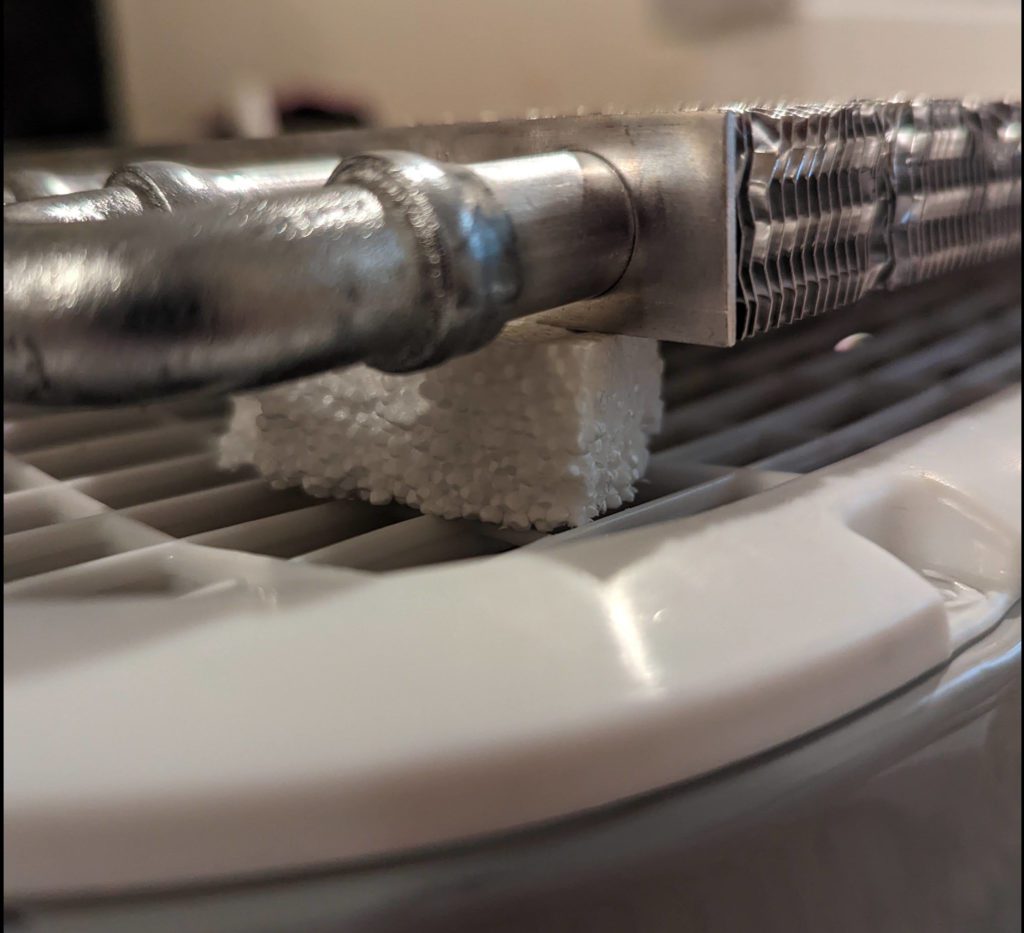
Position a piece of Styrofoam right under each of the four sides of both of the transmission coolers between the coolers and fan. This keeps the coolers from coming into direct contact with the back of the fan.
Step 5)
Using the zip ties, secure the transmission coolers to the grill of the fan.
- Option A) Bend the zip ties in a V-shape to make them easier to insert into the fan grill.
- Option B) Unscrew the rear fan grill and attach the transmission coolers to it with the zip ties.
Step 6)
Connect the transmission coolers in the center using the connector hose. Use the circular clamps.
*Note. Don’t use the ⅜” vinyl tubing for this, since it will affect the flow of the water and it’s easy for the tubing to crimp.
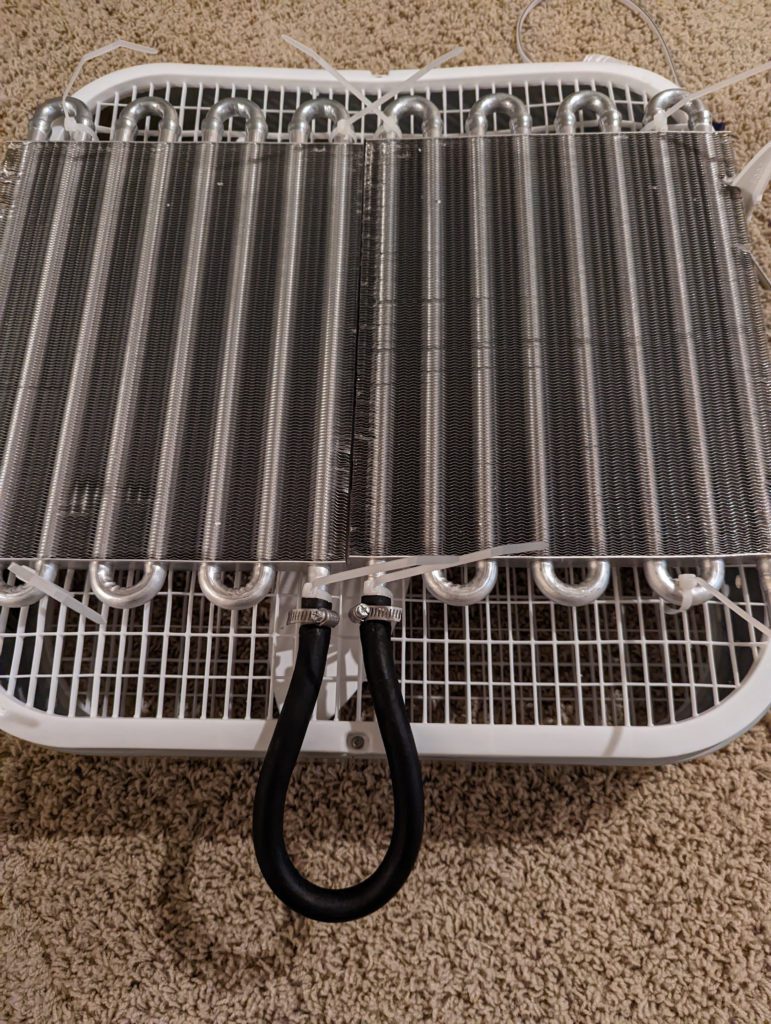
Step 7)
Cut the ⅜” vinyl tubing in half and attach one to the top opening of the transmission cooler, and attach the other to the opening at the bottom of the fan.
Make sure to secure the tubing on each connection using circular clamps. This help to prevent water from leaking.

Step 8)
Connect the water pump to the open end of one piece of vinyl tubing. It doesn’t matter which end because, after testing, the water flow was similar for both.
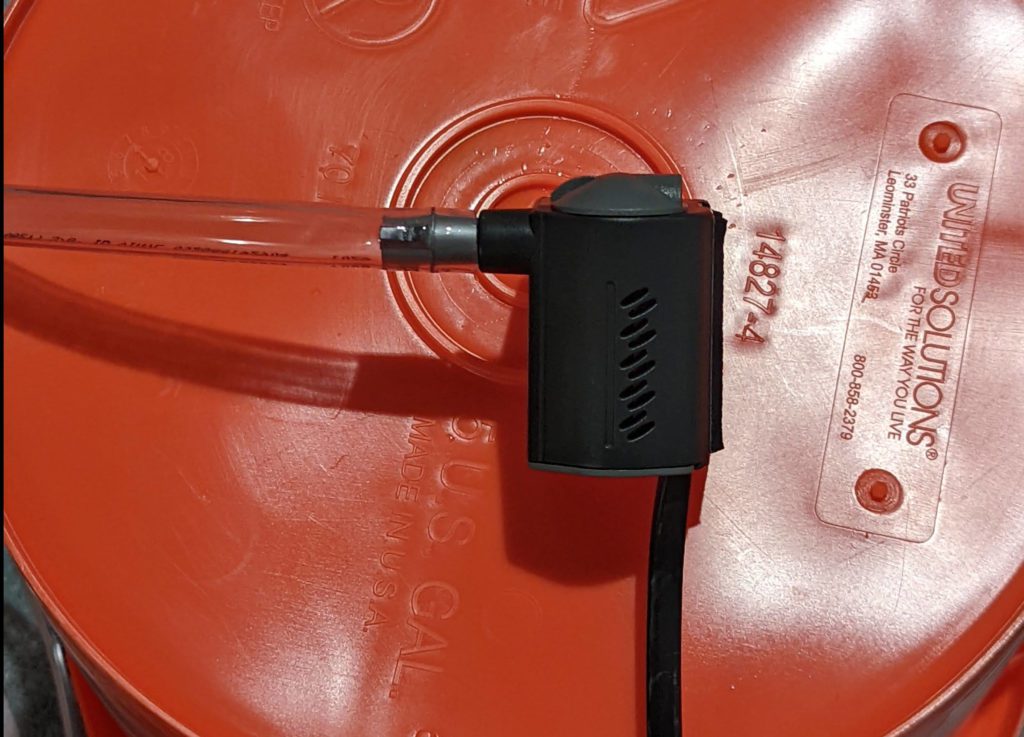
Most water pumps come with adapters to connect the vinyl tubing to the water pump, but if not, that’s ok because as preppers we can make anything work, right?
Unfortunately, our water pump didn’t come with an adapter, so we found a Bic pen cap and cut off the top end. We then used that to connect the pump and the vinyl tubing. It turns out the dimensions were just right to make this work.
Step 9)
Now fill the 5-gallon bucket about half full with cold water. Put ice or a large 1-gallon frozen water bottle inside the bucket as well. If you don’t have access to ice or frozen water bottles, very cold water will do the job, but the resulting cool air won’t last as long.
Step 10)
Put the water pump inside the bucket.
Step 11)
Put the other end of the second vinyl tubing into the bucket as well.
Step 12)
Connect the water pump to a power source (solar-powered if necessary).
Step 13)
Turn on the water pump and test to make sure that water flows from the bucket through the vinyl tubing into the transmission coolers, out the other end, and back into the bucket.
Step 14)
If you’ve got the water flow to work, connect the box fan to a power source and turn it on.
*The water pump doesn’t require a lot of energy. You can use solar power or a large battery.
And there you have it, a homemade air conditioner.
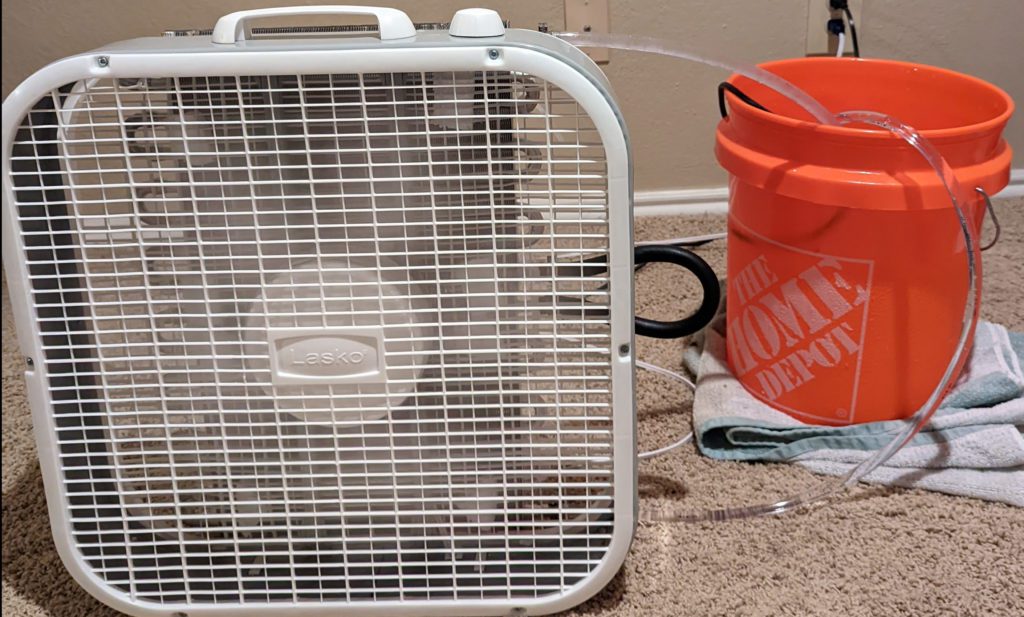
How This Air Cooling Unit Works
The way this homemade air cooler or air conditioning unit works is that the cool water runs through the transmission coolers which causes cool air to radiate from them.
The box fan then sucks up the cool air from the back of the unit and blows it out the front.
Because the water pump runs constantly, the water is recycled through the bucket, cooled down again, and then out it goes to continue keeping you and your family cool for a little while.
This isn’t a full-blown air conditioner, but it helps if you’re in a bad spot and it’s hot.
Conclusion
One of the keys to being a successful prepper is knowing when to innovate when you have limited resources. If you look around your house, there might just be more resources than you know!
Creating a homemade air conditioner is the perfect way to create cool air when you’re off the grid.
Stay prepared friends!!!


